DIY devices
Do you have a Raspberry Pi board lying around unused? Use it as your ShackConnect Server or Client device! Simply download an image for your device from the SERVERS / CLIENTS page and flash it on an SD card using the official RPi Imager tool.
To unlock the full feature set available in the Server Pro and Client Pro, you must order them from the online shop, as these rely on custom hardware not present on the standard Raspberry Pi boards.
There is no need to download and flash an image, as your device comes ready to use.
You simply have to attach it to your account by entering its S/N.
Prerequisites
- Supported Raspberry Pi board (see below)
- SD card with at least 16GB capacity
- SD cards with fast read speeds are recommended to enable faster startup
- For Server device:
- License subscription is needed for your first Server device
- Extra Server subscription is needed for additional Server devices
- For Client device:
- No subscription is needed for your first Client device
- Extra Client subscription is needed for additional Client devices
Supported Raspberry Pi boards
The following Raspberry Pi boards are supported as ShackConnect Server devices:
- Pi 5 (recommended)
- all 1GB+ memory versions
- Pi 4
- all 1GB+ memory versions
- Limitation: Does not work with more than 2 USB radio devices, see below.
- Pi 3B / 3B+
This can cause issues when connecting more than 2 USB radio devices.
The following Raspberry Pi boards are supported as ShackConnect Client devices:
- Pi Zero 2 W / WH
- Please make sure you are using the data micro USB port to connect to the PC. The data port is placed second from the edge of the board. The USB port on the edge of the board is power only.
These will require a separate power source, as they cannot be powered from the computer like the Zero 2 W can.
Downloading an image
Go to the SERVERS or CLIENTS management page and click the DOWNLOAD IMAGE button in the UTILITIES panel on the right side of the device card.
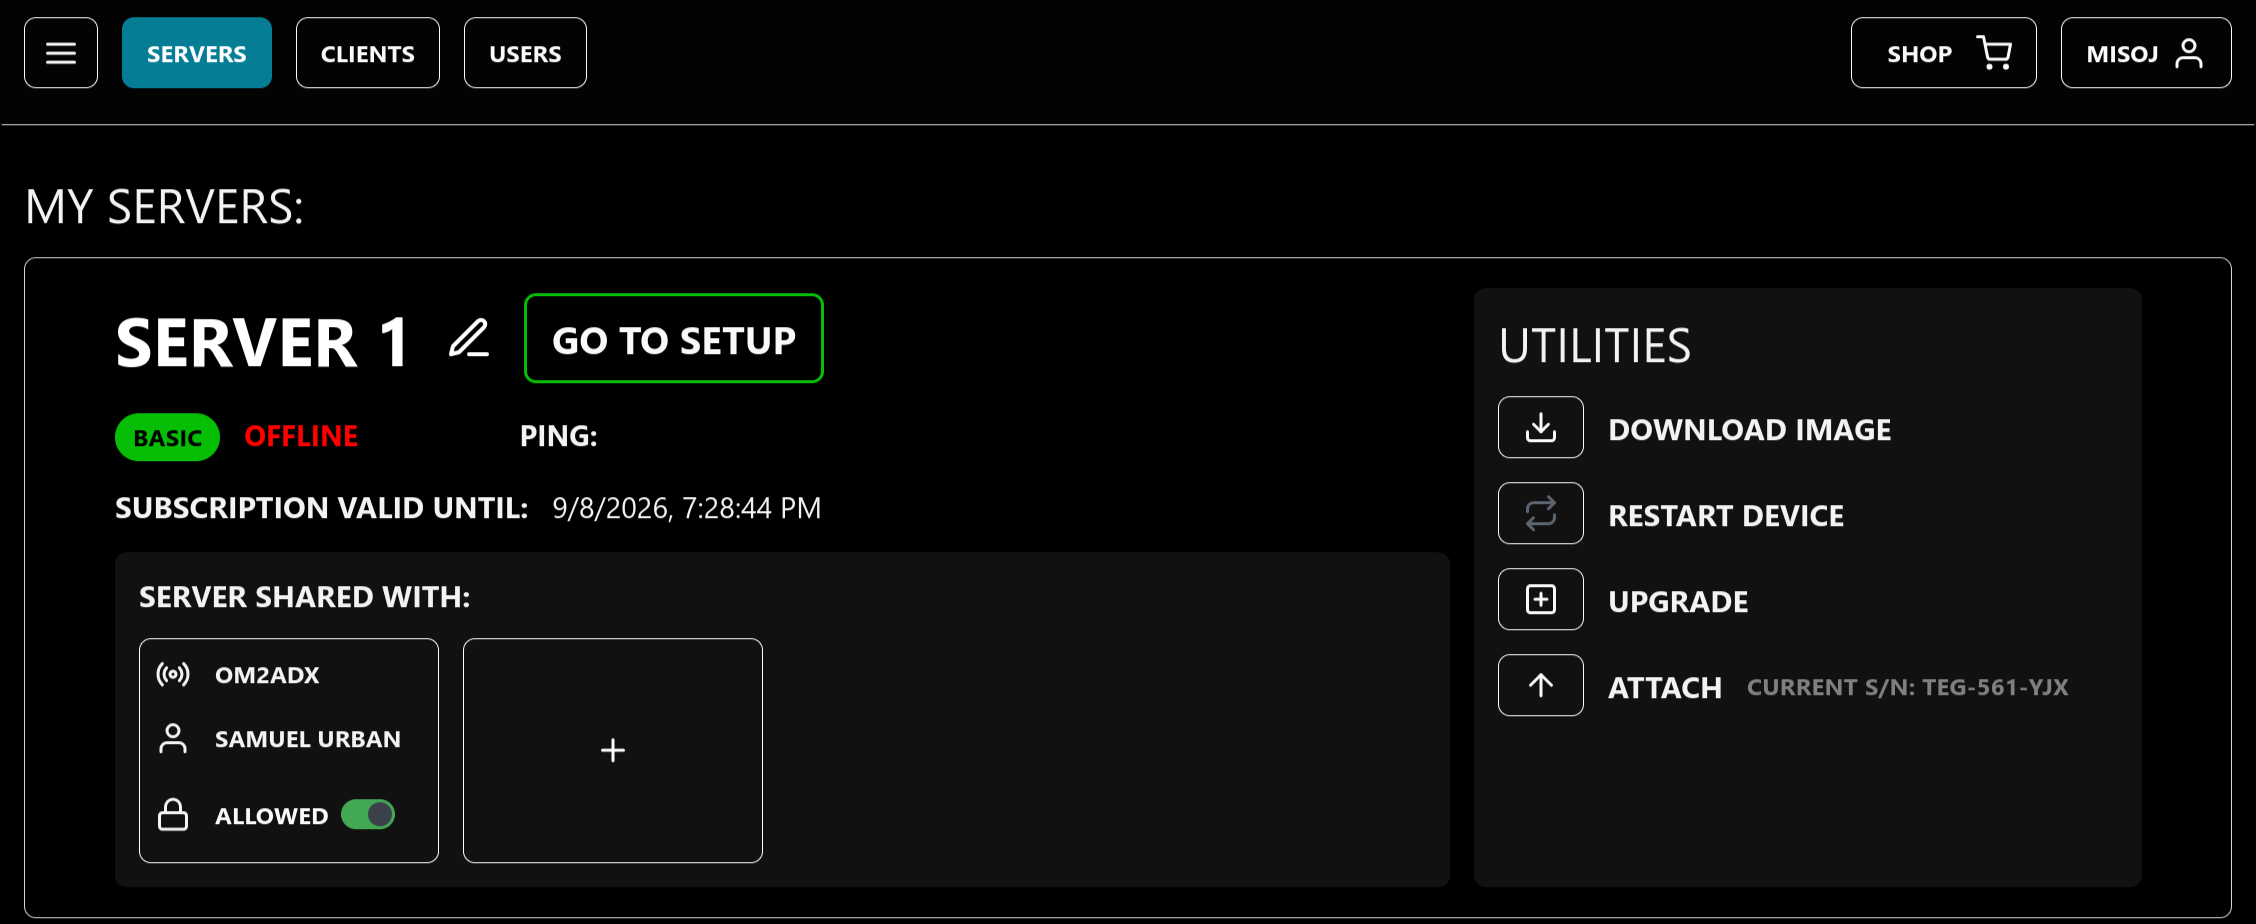
Please make sure that the image you flash on the SD card was downloaded from the device card for that specific device.
The DOWNLOAD IMAGE button in each device card gives you a unique image configured for that device. This allows you to use your device without any extra configuration; you simply plug it in and it comes online!
Flashing an image on an SD card
We recommend flashing the image with the official RPi Imager (preferably the older 1.9.x version):
To flash the image on an SD card with RPi Imager 1.9.x:
- Press the CHOOSE OS button.
- Scroll to the bottom of the menu and select Use custom.
- Select the image that you downloaded from the device management page.
- Press the CHOOSE STORAGE button and select the SD card that you will put into the Raspberry Pi device.
- Press NEXT.
- (optional) You can choose to apply / modify the OS customization settings.
- For example, set up Wi-Fi or enable/disable SSH.
If you are flashing a Server device, make sure it can connect to the internet — ideally with an Ethernet cable. Wi-Fi also works (configure it with OS customization settings before flashing), but is not recommended due to added latency and jitter.
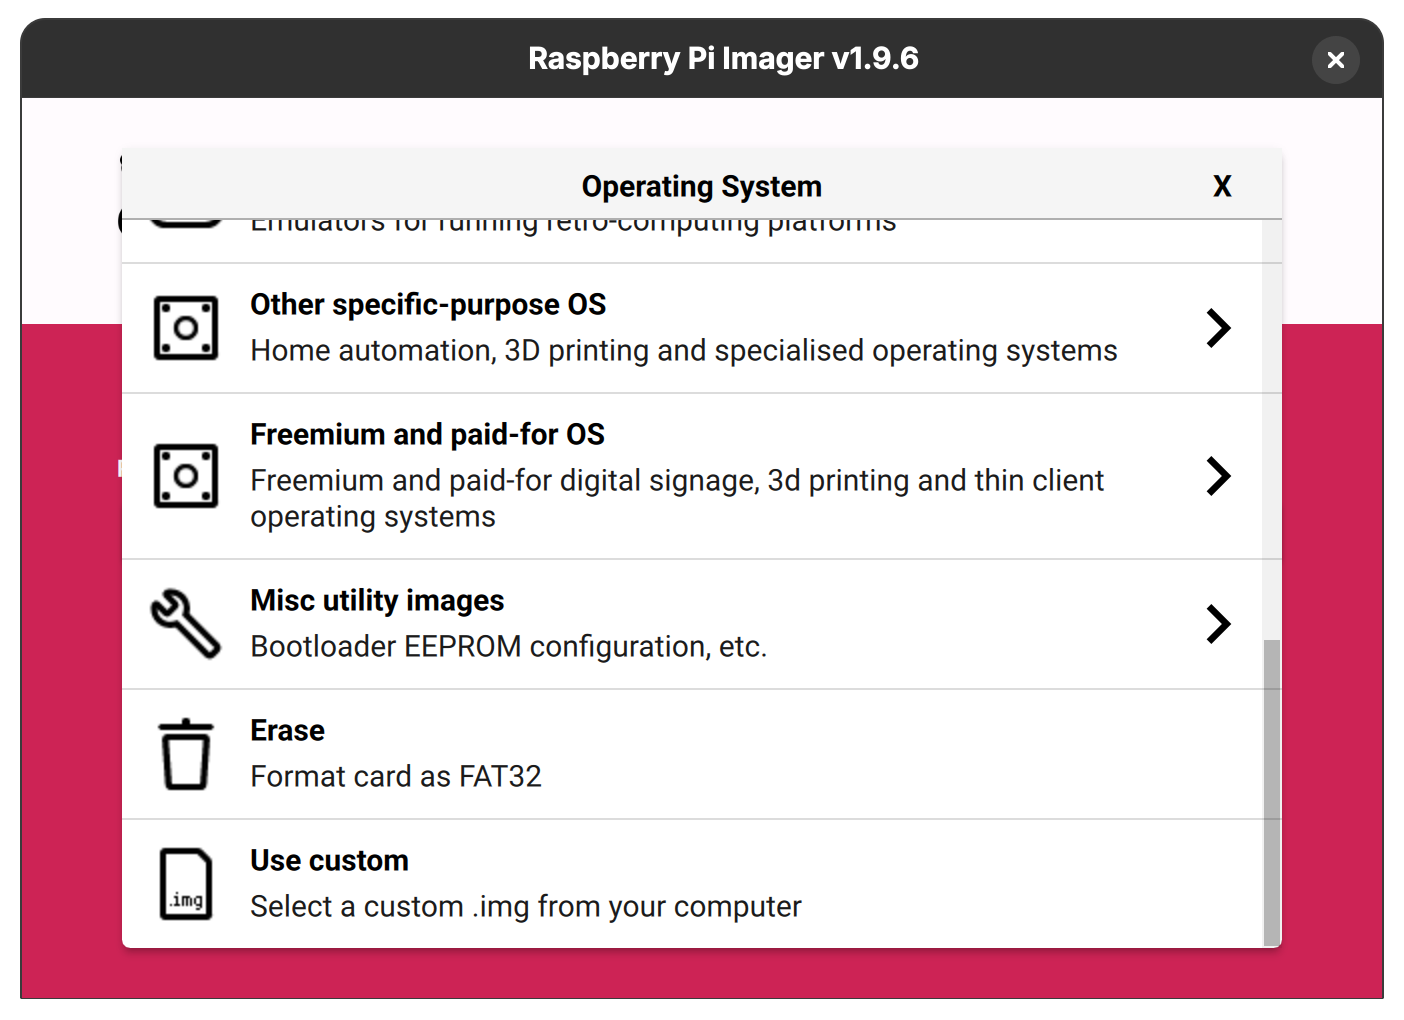
RPi Imager 2.x does not support applying customization settings on custom images. If you want them, use the recommended 1.9.x version.
Once the SD card is flashed, insert it into your Raspberry Pi, then proceed with the instructions:
- for Server setup.
- for Client setup.